Back to all
How to update restaurant pricing in MadChef as a distributor

Objective
This guide explains how a salesperson for a food distributor company can update restaurant pricing in MadChef using either a manual edit or a price sheet upload. It covers both simple and complex spreadsheet formats so pricing can be updated accurately and efficiently.
Key Steps
1. Open the weekly price update request 0:09
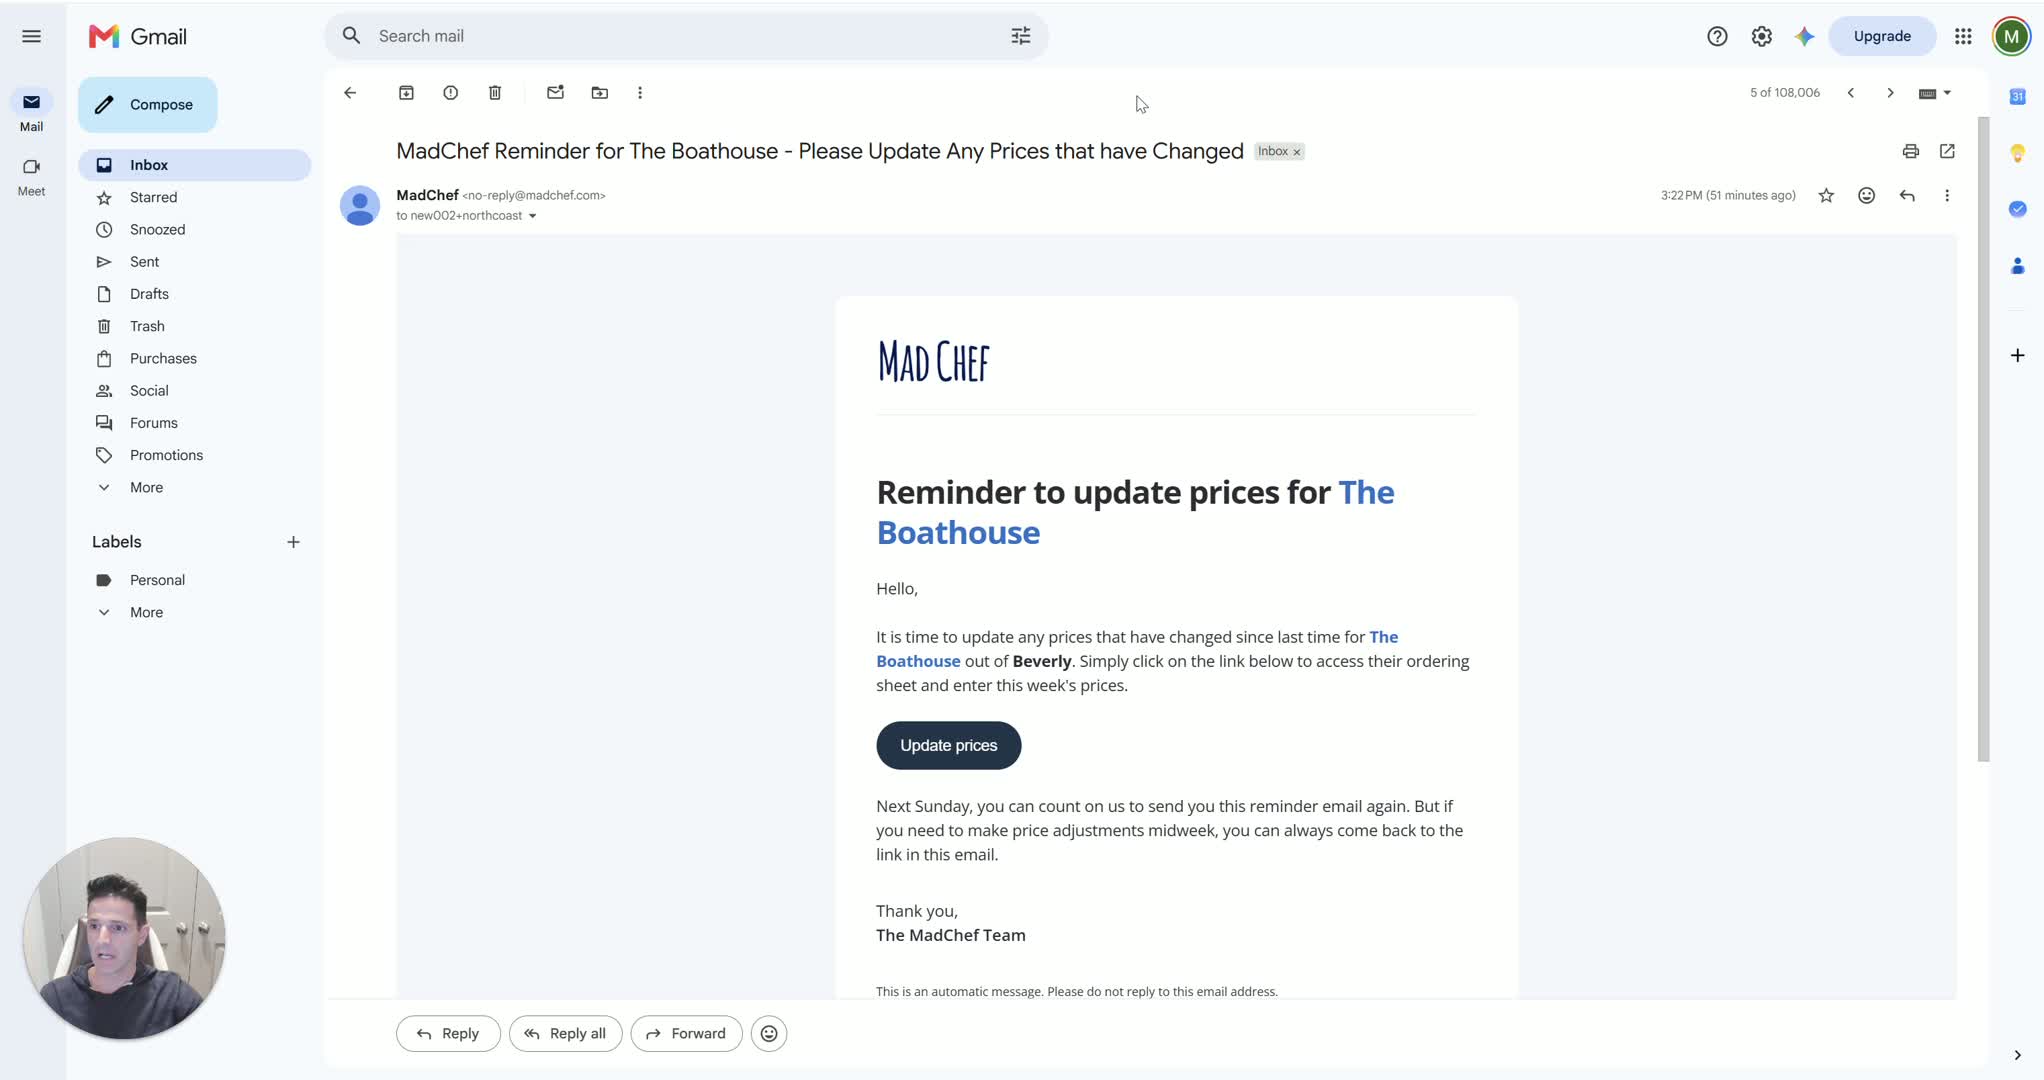
Check the weekly email sent every Sunday to all salespeople requesting price updates.
Open the email and click the provided link to begin the update process.
Confirm you are in the correct restaurant pricing workflow before proceeding.
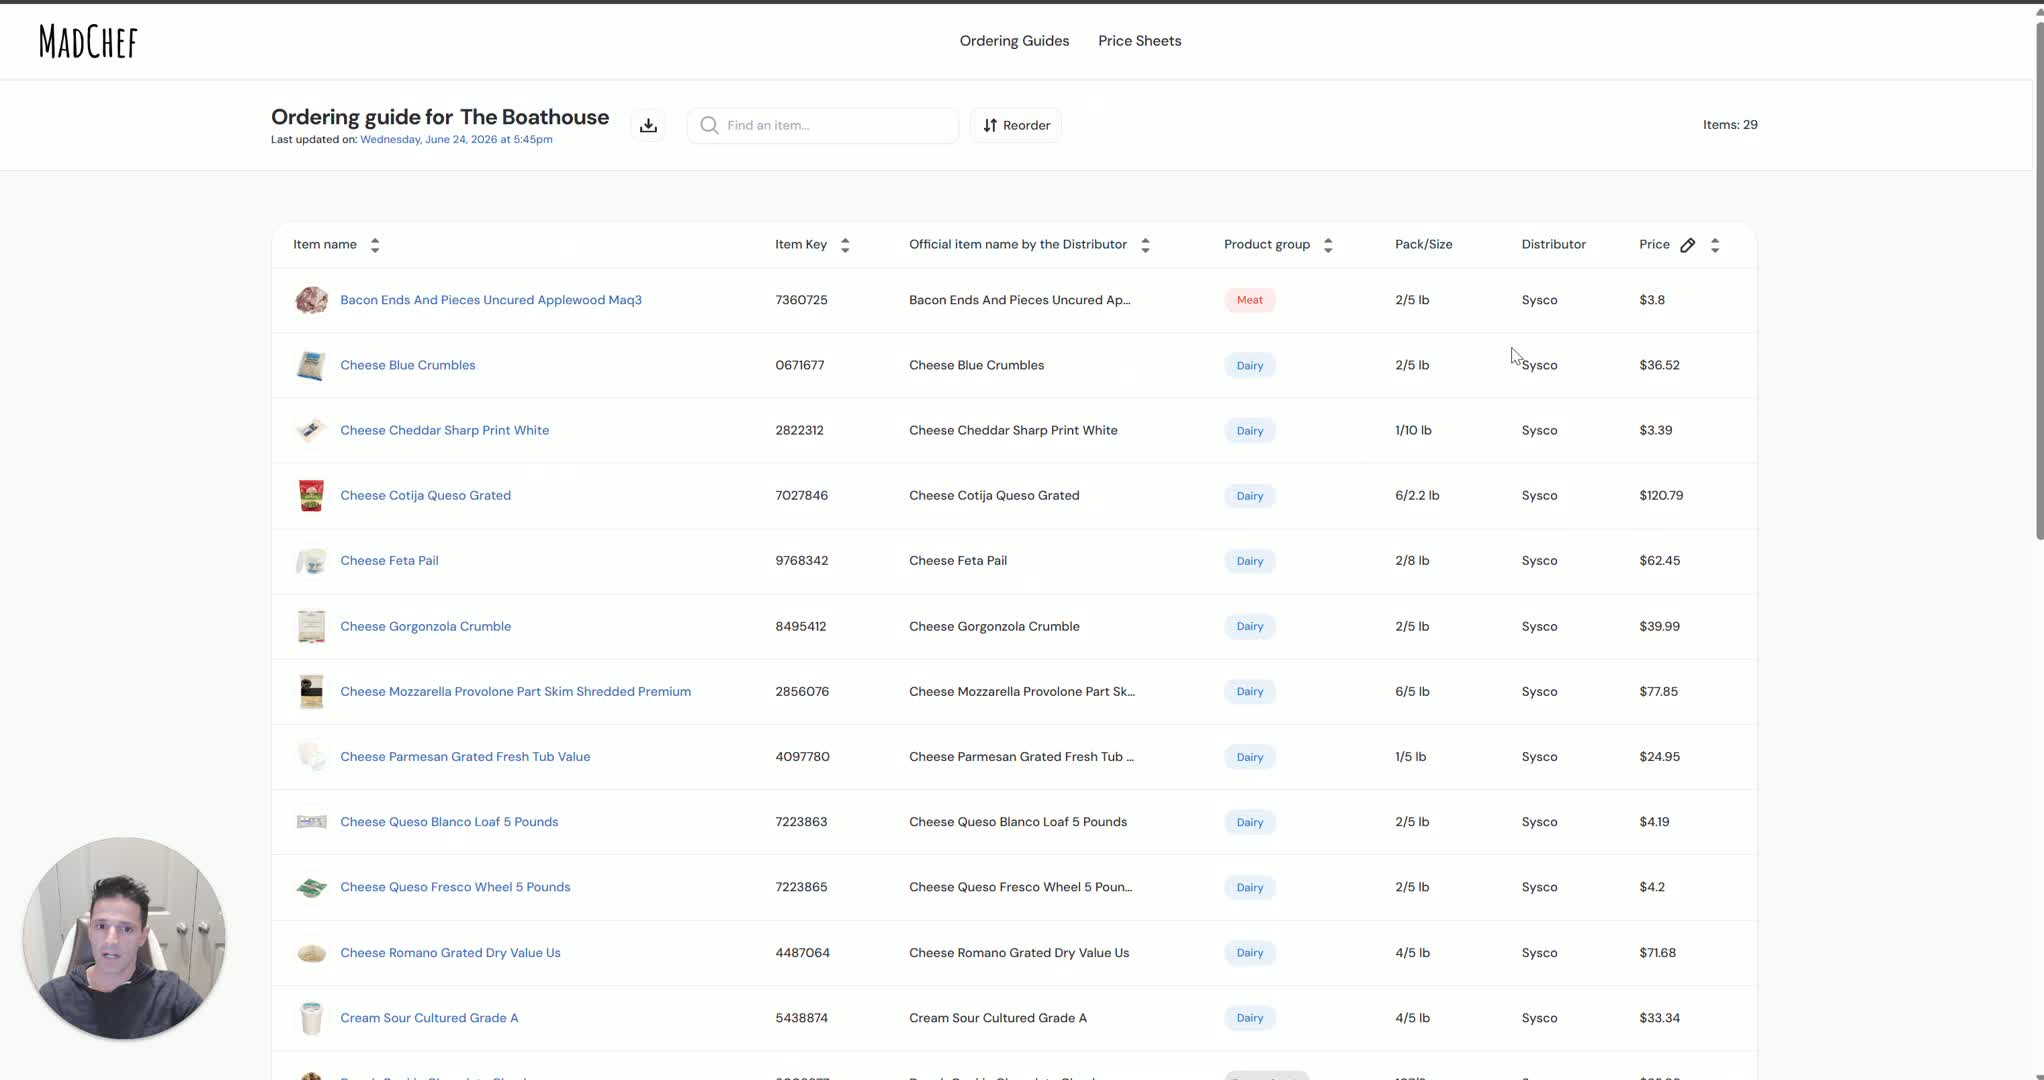
2. Review the restaurant ordering guide 0:20

After clicking the link, review the ordering guide displayed on the screen.
Verify whether the guide was created by you or imported by the chef.
Confirm the items shown are the products carried for that restaurant.
3. Choose the pricing update method 0:32
Decide whether to update prices manually or by uploading a price sheet.
For small updates, use the pencil icon to edit prices directly.
For this guide, continue with the price sheet upload process.
4. Upload the price sheet file 0:43

Select the price sheet file from your computer.
Upload the Excel or CSV file into MadChef.
Make sure the file contains the pricing data you want to apply.
5. Identify the first row with actual product data 0:58

Review the spreadsheet preview and locate the first row that contains real product information.
Ignore header rows that do not contain product data.
Mark the first valid data row so MadChef can read the file correctly, then click Next.
6. Map the required columns 1:08

Identify the column for Item Name.
Identify the column for Price.
Identify the column for Item Key.
Confirm these are the three required fields MadChef needs to match items correctly.
7. Confirm whether additional columns exist 1:28

If the file has no extra fields, select No additional columns.
Click Next to continue.
Proceed to the linking screen where restaurant items and uploaded items are matched.
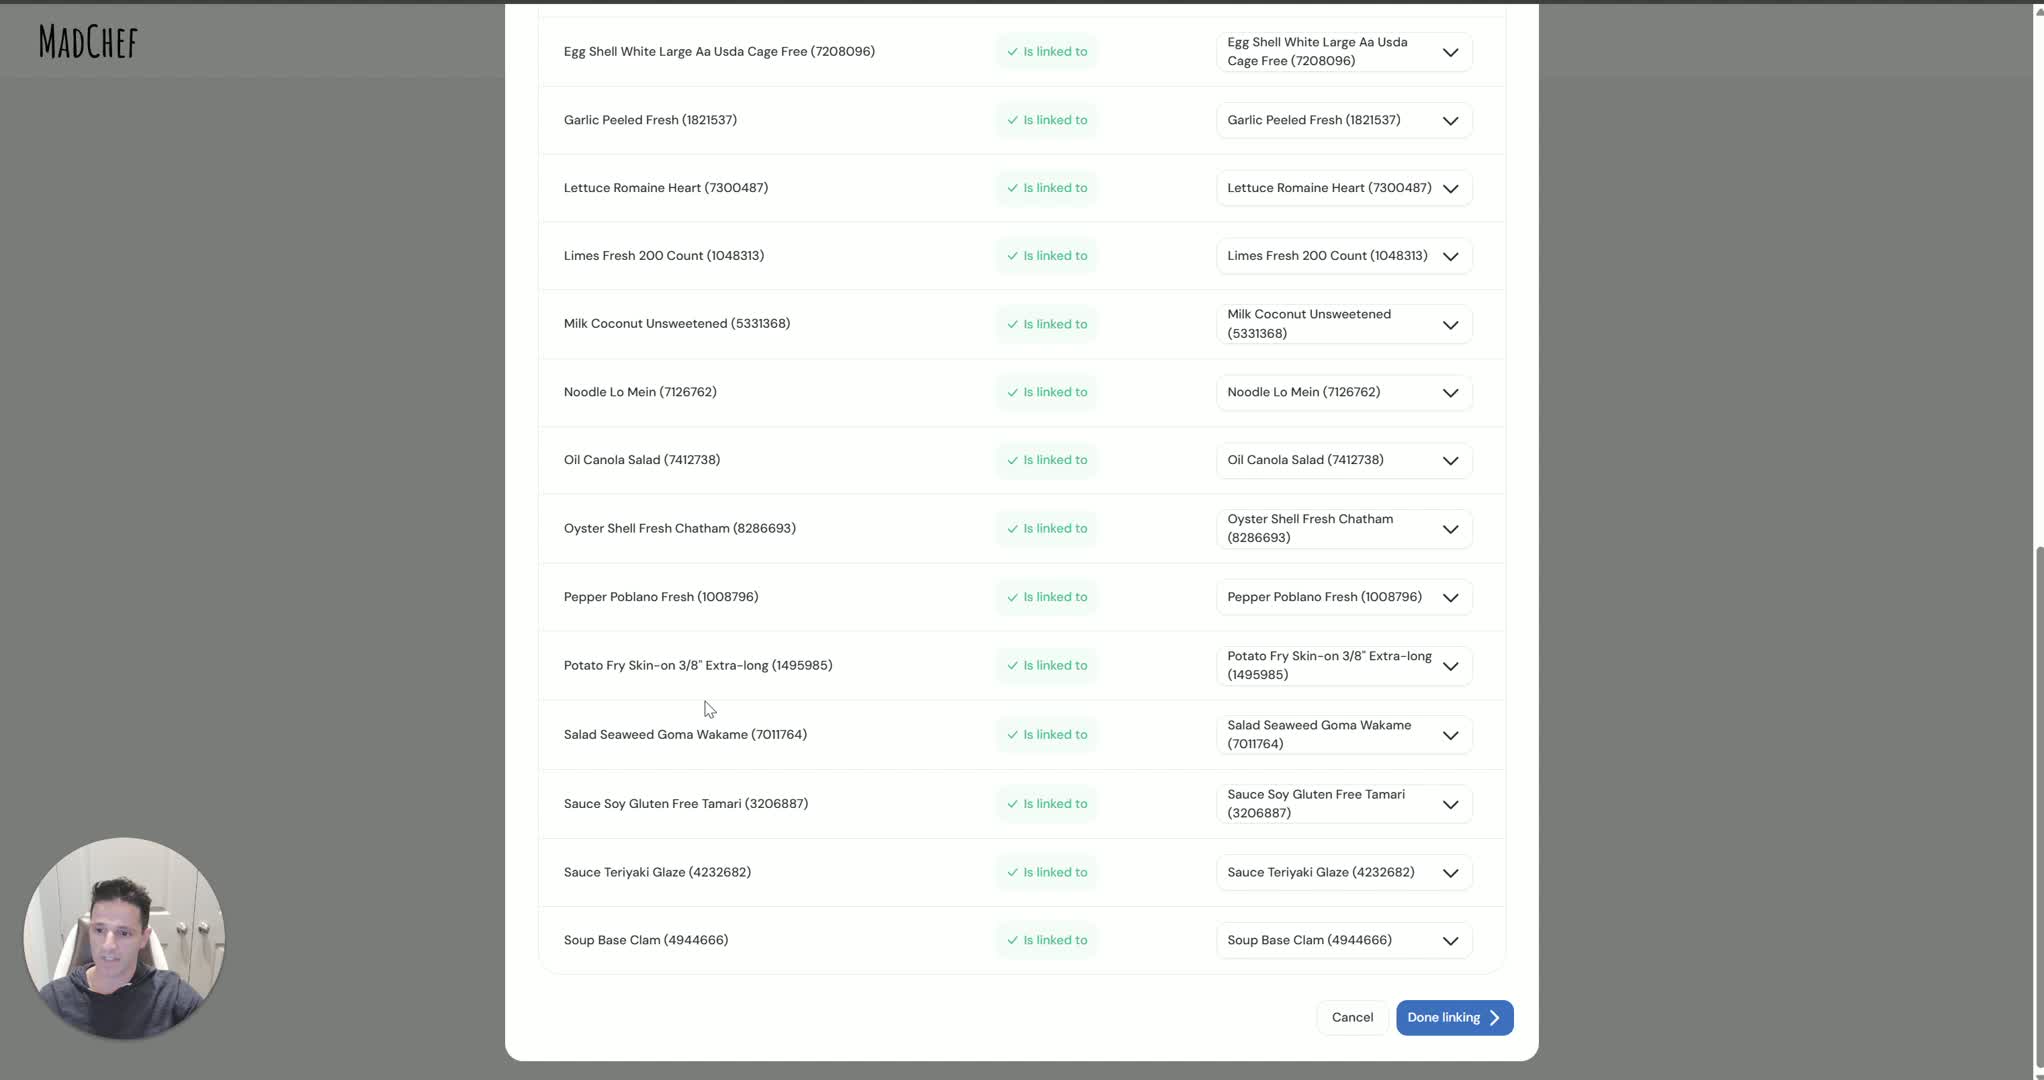
8. Review and verify item linking 1:34

Review the left side of the screen, which shows the items the restaurant is buying.
Review the right side, which shows the items from your uploaded price sheet.
Confirm that items already linked appear grayed out and match by exact item key.
Verify that the correct products are paired before continuing.
9. Confirm and save the update 2:05
Once the item mapping looks correct, click Confirm.
Save the changes to complete the upload.
Understand that future weekly updates can follow the same process without relinking items again.
10. Handle more complex spreadsheets 2:38

If the spreadsheet has multiple columns or a more complex layout, start the same upload process again.
Go to the price sheet upload area and select the file.
Locate the first row with actual product data before mapping columns.
11. Map all relevant columns in the complex file 3:23

Assign the correct columns for Item Name, Price, and Item Key.
Indicate that the file contains additional columns if applicable.
Map each field carefully so the system can distinguish between item name, pricing, and key data.
Verify the color-coded pairing to ensure each column is matched correctly.
12. Finish linking and save the complex upload 4:14

Review the full list of items imported from the spreadsheet.
Confirm that the item key mappings are correct.
Click Done Linking, then Confirm and Save.
Use the same update process in future weeks when prices change.
Cautionary Notes
Do not skip the step of identifying the first row with actual product data; header rows can cause upload errors.
Make sure the Item Key matches exactly, since linking depends on exact matches.
Verify the correct columns before confirming, especially in spreadsheets with multiple columns.
Review the linked items carefully before saving to avoid updating the wrong restaurant items.
If the file format changes from week to week, recheck the column mapping before uploading.
Tips for Efficiency
Use the upload process for larger price lists instead of editing prices one by one.
Once items are linked, future weekly updates should be faster because relinking is not required.
Keep spreadsheet column names consistent across weeks to reduce mapping time.
Double-check the preview before confirming to avoid rework.
Use the item key as the primary reference for accurate matching.